Wednesday, December 15, 2010

Are you suggesting coconuts migrate?

Not at all!  They could be carried... in this case, by a transport truck to the grocery store.

While not overly fatty, the vast majority of the fat in coconut "meat" (and therefore also coconut milk) is saturated fat, and so sadly you probably don't want to eat large amounts of coconut regularly.  Coconuts do contain many healthy properties though, so our coconut indulgences are not all for naught.  One cup of coconut meat has 11% of your recommended daily intake of iron, and coconut water (the liquid from the middle of the coconut) has the highest natural source of electrolytes, making it nature's perfect sports drink. Coconut water can also be used intravenously to rehydrate people in desperate (usually remote) situations!  Find out more about coconuts here.


Factoid: the Coconut is a "drupe" and not truly a nut.

This winter I've been working at a diner that also has a bakery attached to it.  This means that those who come to dine have at their disposal a plethora of pies, cakes, and other goodies to eat for dessert.  One of the most popular desserts is coconut cream pie.  After weeks and weeks of bringing coconut cream pies to people, I was really really craving some coconut.  I'm devising a plan for making a vegan coconut cream pie, but I've been in a cupcake mood lately.  I decided to adapt the Golden Vanilla Cupcakes recipe from Vegan Cupcakes Take Over the World cookbook (if you don't have this book, go buy it!  It is indispensable!).  I wanted to top them with some of my Coconut Whip, but my impatience made for unsettled coconut cream, and I resorted to a batch of Fluffy Buttercream Icing instead.  I have coconut milk settling in the fridge and I hope to rectify this situation tomorrow. Until then, on to the cupcakes!


Vegan Coconut Delight Cupcakes
Makes 12 cupcakes

1 cup coconut milk
1 1/4 cup all purpose flour
2 tbsp cornstarch
3/4 tsp baking powder
1/2 tsp baking soda
1/4 tsp salt
1/2 cup canola oil
3/4 cup sugar
2 tsp vanilla extract
1/4 tsp almond extract
     (or coconut extract if you can find it!)
1/2 and 1/4 cup unsweetened shredded coconut

Preheat oven to 350.
Beat together coconut milk, oil, sugar and extracts.  In a separate bowl combine dry ingredients (except coconut).Combine wet and dry ingredients. Fold in 1/2 cup coconut.
Fill cupcake liners about 2/3-3/4 full and bake for about 20 minutes or until a toothpick comes out clean.
Transfer to a cooling rack.

Spread remaining 1/4 cup of shredded coconut out on a cookie sheet lined with parchment paper.  Toast the coconut in the oven (still at 350).  Do not leave unattended!  Toasting only takes a minute or two.  Take them out when they turn a nice golden brown and transfer from cookie sheet to a bowl immediately (they can continue toasting on the sheet, coconut shreds are very sensitive it seems!).

When cupcakes have completely cooled, ice with coconut whip or fluffy buttercream icing and sprinkle the tops with toasted coconut.  Enjoy :)  If you do use coconut whip, I would ice on an as-needed basis, since coconut whip should be kept refrigerated and might make your cupcakes soggy :(

Seriously, seriously delicious cupcakes.

**UPDATE**

Today I successfully made a batch of coconut whip.  Patience is a virtue when it comes to baking, it would seem - you can't cut corners with this one, wait til the coconut milk has been in the fridge overnight!  And all I have to say is WOW!  Do yourself a favour and ice these with coconut whip - they are heavenly cupcake perfection!!

Yumm-o!!

Friday, December 10, 2010

"Food is not about impressing people. It's about making them feel comfortable." - Ina Garten

I came across this risotto recipe a few years ago via the "20-minute supper club" from Wish.ca. I obviously have omitted the cheese. Although it isn't a vegan site, they do occasionally post easily veganizable recipes.

Risotto is frequently thought of as a cream-based dish.  While many risotto recipes call for cheese, it is actually the rice itself that produces the characteristic creamy consistency.  A starchy rice is used, typically arborio rice, and broth is added slowly as it cooks, stirring constantly.  This releases the starches from the rice, and voila: dairy-free creaminess is the result.

If it were up to me, I wouldn't have called this recipe a risotto.  It is atypical in that it uses short grain brown rice instead of arborio or similar rice.  It also cheats a little by adding all the stock at once instead of gradually over the cooking process.  The end product is still creamy, but slightly healthier variation on the old standby.  It is certainly not traditional, but a highly recommended comfort food for cool days.


Veganized Brown Rice Pumpkin Risotto


1 bulb roasted garlic
1 cup finely chopped leeks*
2 cups short grain brown rice
2 cups peeled, diced pumpkin or squash
1/2 cup orange juice
4-5 cups vegetable broth
3 cups baby spinach (maybe try kale or other greens!)
1/4 tsp nutmeg
1/2 cup chopped walnuts

*Tip: leeks tend to have a lot of dirt between the layers, so chop first then rinse really really well in a colander to get all the grit out.

Roasting Garlic:
Preheat oven to 400.  Trim top of garlic bulb so the tips of each clove are snipped slightly.  Drizzle olive oil over bulb (skin and all) and wrap in foil.  Bake in the oven until soft (about 40 min).  Don't worry, you won't need the garlic til the end of the risotto, so you can start roasting the garlic when you start preparing the risotto.  When the garlic is done (and cool enough to handle), squeeze the bulb so that the cloves come out, discard skin.

Risotto:
Saute leeks over medium heat in olive oil til soft. Add the rice and stir til it is coated in oil and slightly translucent.  Stir in pumpkin and juice, increase heat to high.  When juice is nearly evaporated, add stock, bring to a boil, reduce and simmer for about 40 minutes, stirring occasionally. Add spinach leaves, roasted garlic and nutmeg.  If you're using kale or other greens that are a bit tougher than baby spinach you may wish to add them a little earlier on in the cooking process (5 minutes sooner).  Top with chopped walnuts and enjoy :)

Friday, November 5, 2010

I scream! You scream! We all scream for Poutine!

Like any real Canadian, before I was a vegan, poutine was one of my favourite foods. For any of you readers who are not from Canada and have not heard of it, poutine is fries covered in fresh cheese curds and gravy. A heart attack waiting to happen? Possibly. But it would be the most delicious of heart attacks.

Sadly, one of the downfalls of veganism is a distinct lack of adequate poutine replacements. Last week, when I was in Kingston, we walked by a place called "the Poutine Place" at 343 Princess Street. Its sign boasts of organic burgers and smoothies. I looked at the menu, searching for a veggie burger and was shocked to see that there was a vegan poutine on the menu!! With veggie gravy and soy curds, there was nothing that would have kept me from ordering one of these wonders. I had heard rumours of vegan poutine in Montreal before, but I've also heard rumours of ghosts, fairies, and easter bunnies. But here it was. And I have to say, it was pretty good. Did it taste like real Canadian poutine? Meh. Was it fries smothered in gravy, a cheese-like substance, and decidedly unhealthy? Absolutely. Win. The thing the cheese like substance was lacking was the melty, stringy, get stuck to your chin gooeyness that usually accompanies poutine.

Enter Daiya.

Glorious, glorious Daiya. I was in Tara Natural Foods in Kingston a few months ago, chatting with the sales clerk, when he asked me if I had ever tried Daiya cheese. He, like me, had all but given up on vegan cheese, but informed me that vegans everywhere were going bananas for this stuff. I excitedly bought some, brought it home, and made the best vegan pizza I had ever eaten. I was in love.

So after my vegan poutine experience, I have decided to have a go at making my own for the first time in over 3 years. I found this gravy recipe a few years ago which I absolutely love (I use a little gravy browner when I make it). The first time I tasted it I immediately thought of poutine sauce (a particular kind of canned gravy you can find in Canadian supermarkets). Salty, tangy, and oh so good on potatoes, this gravy recipe has become a stand-by for holiday feasts. Pair it with some mozza style daiya shreds and some hand-cut homefries, and you've got yourself the perfect vegan poutine.  Seriously, seriously tasty.  This poutine was as close to perfect as vegan can deliver.  Make it.  Love it.

Best Ever Vegan Poutine!


Thursday, November 4, 2010

Squash-travaganza!

Let's talk about squash.  I love squash.  All kinds of squash, even the sport!  Squash squash squash!
Sweet dumpling and acorn squash
Squashes belong to the family Cucurbitaceae which includes such wonderful fruits as melons, gourds and cucumbers.  There is a huge variety of squashes, including pumpkin, zucchini, butternut, acorn, hubbard, cushaw, buttercup, sweet dumpling, celebration, cream of the crop, sweet mama, turban, spaghetti, delicata, heart of gold.... and still more that I haven't heard of yet.

Celebration, Cream of the Crop, and Heart of Gold squash
Although there are so many varieties, they belong to only four species:  Cucurbita maxima (hubbard squashes), C. mixta (cushaw), C. moshata (butternut squash), and C. pepo (pumpkins, zucchini, acorn squash).
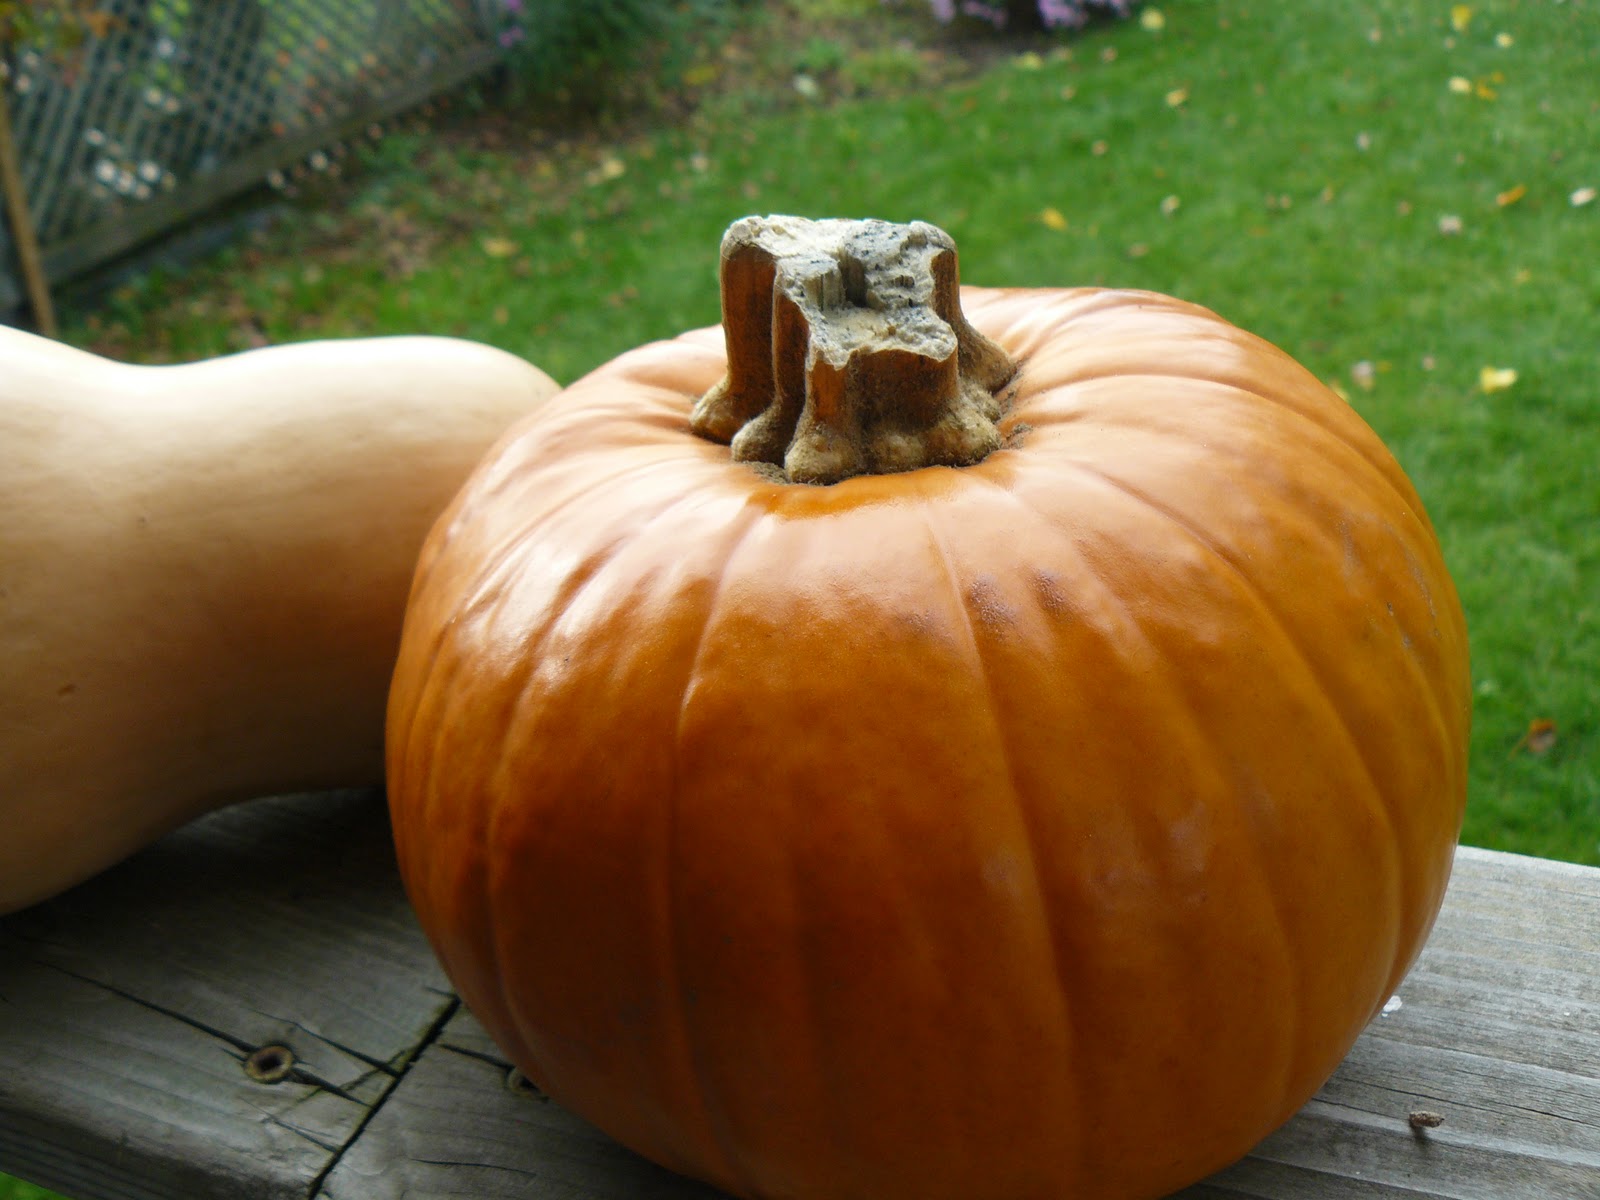
Butternut squash and pie pumpkin
Squash were domesticated in Mexico eight to ten thousand years ago [1].  They were an important food staple in central and north america.  Native Americans know squash as one of the "Three Sisters", along with corn and beans.  The three crops were planted together - the corn stalk was used to support the bean vine, and the large squash leaves trapped moisture in the ground for the growing plants and inhibits the growth of weeds.  Incidentally, combined together, squash, beans and corn make an excellent "Three Sisters soup".
Oven-roasted Sweet Dumpling squash with Sweet & Savory Quinoa
There are many ways that I like to use squash.  Have a sweet tooth?  Try these totally awesome chewy pumpkin oatmeal cookies.  They're my all time favourite cookie and I have yet to meet someone who doesn't love them.  Zucchini is awesome sliced, seasoned, and roasted in the oven or grilled on the barbecue (or campfire!).  Acorn squashes and their kin are perfect cut in half, roasted in the oven, with a little margarine and brown sugar sprinkled inside.  Butternut squash is my favourite for making fantastic (and filling) soups.
Butternut squash soup with maple syrup drizzle (and my cat Skrabble!)
Basic Butternut Squash Soup

1 onion, diced
1-2 tbsp margerine
1 Butternut squash, peeled & cubed
Water
vegetable bouillon cubes
Nutmeg, cinnamon & allspice, a few good dashes of each
Maple syrup for drizzle (optional, but awesome)

Saute onion in margarine until caramelized.  Toss in the squash and add enough water to just cover the squash. *Tip: measure your water as you're pouring it in so you know how many bouillon cubes to add!* Add your bouillon cubes and spices, and bring to a boil.  Let it simmer until the squash cubes are soft.  Puree the soup with a hand blender. If you're using a regular blender, make sure you vent the lid and cover it with a cloth so it doesn't create a pressure build-up and burst hot steam/soup in your face.  Nobody wants to be burned by squash.  At this point the soup could be pretty darn thick, so add some water, a little at a time.  I like to be conservative with my water during cooking because you can always add more but it's so much harder to take it away if you've added too much!  When you get the soup to the desired consistency, ladle some in a bowl and swirl a drizzle of real maple syrup on top, perhaps grate a little nutmeg on there.  Not only does it taste delish, it makes it look extra snazzy!

Wednesday, November 3, 2010

Going green

This summer, while living in Kingston, I regularly frequented their fantastic farmer's market. While at one of the booths I overheard one of the farmers describing tomatillos.  As the name would suggest, they belong to the tomato family, and are closely related to ground cherries.  Like ground cherries, they're wrapped in a beautiful papery husk that remind me of paper lanterns.   They taste a bit like tomatoes, but a little more tart and I found them a bit sweeter.  I love experimenting with new ingredients, but to be honest, I bought these because they're so darn pretty.

Tomatillos are a staple in Mexican cooking, particularly in Salsa verde, so naturally, that's what we made with them!  In fact, we had a whole mexi night, and made fajitas with homemade whole wheat flour tortillas!  I don't remember which website I got the tortilla recipe from, but they're all more or less the same. The rolling of the tortillas was a bit time consuming, but otherwise, it was really easy!  A quick cook in a hot, dry pan, and bam!  Fresh, homemade tortillas!


The salsa verde was a sweet, fresh and tangy alternative to my usual homemade salsa.  I made this a long time ago so I can't tell you how much I used of what, but just wing it!  That's what I did!

Salsa Verde

-Tomatillos
-Onion
-Jalapenos
-Fresh cilantro (don't be shy!)
-Fresh lime juice
-Sugar
-Garlic


Combine ingredients in a food processor (or chop the heck out of it!) so that everything is chopped finely but still has enough chunkiness to give the salsa some body.  That's how I like it at least.  

Tuesday, November 2, 2010

Bean Burgers and Blogrolls

While some of you may be celebrating the month of November by growing a hideous creature on your upper lip (aka the Movember Mustache), vegans are celebrating by blogging about delicious food. This year marks the fourth annual Vegan Month of Food, affectionately known as Vegan MoFo. Over 500 vegan bloggers have signed up this year to share their love of food with the world. Heck, with numbers like those, there are probably vegan bloggers who are growing
mustaches. I would have been one of them (blogging, not growing a mustache), but I missed the sign-up deadline by a matter of hours. Bummer. I will still be posting delicious recipes this month in honour of Vegan MoFo, and I encourage you to check out the blogroll and marvel at the plethora of vegan wonders that will present themselves to you daily.

Tonight for dinner I made some homemade bean burgers that were so good, easy, and versatile, I can't see myself spending money on store-bought veggie burgers ever again. I've made other forms of veggie burgers before, and they always fall apart and are never quite as good as my old standby, the Lick's Nature Burgers. These actually held together! Our BBQ is packed away for the season, so I didn't try them out on the grill, but if that's how you want to roll, I would try freezing them first so they don't get lost between the grills.

I'll give you the basic recipe, and you can jazz it up however you like. The possibilities truly are endless people!

Honey garlic style bean burgers with sweet potato homefries

Basic Bean Burgers
Makes about 6 normal sized patties

1 can kidney beans, drained and rinsed
2 tbsp ground flax seeds
1/3 cup water
1/2 onion
2-3 cloves of garlic
2 tbsp olive oil
3 tbsp sauce*
Spices*
3/4 cup bread crumbs

In a wee dish, combine the water and flax seeds and let them sit and goop up while you work.
In a large bowl, mash up the kidney beans to form a paste.
Mince onion and garlic in a food processor and add to bean mixture, along with oil, sauce, and spices. Add the now gelled up flax seeds.
Add the bread crumbs a little at a time, mixing well, until you get a stiff mixture, about the consistency of cookie dough.
Shape into 6 patties (or 4 if you like your burgers really thick!). Bake in the oven at 350-375ish for about 15 minutes, then flip, brush with sauce (optional, but why wouldn't you?!) and bake for an additional 10-15 minutes. Put it on a bun, top it however you like it, and enjoy!

* Some thoughts on sauces and spices.
This is where you get to have fun with your burgers! The possibilities are endless here for different burger combinations. In the burger pictured above I kept it simple, using honey garlic BBQ sauce, and a few dashes of plain old salt and pepper as my spices. You can use all kinds of things for your sauces such as traditional BBQ sauce, chili sauce, salsa, stir-fry sauces, spaghetti sauce, pizza sauce. If it's a sauce, chances are there's a way to incorporate it into a burger.

Below you'll find a few ideas that you could use to jazz up your bean burgers:

Mexi burger: sauce= salsa; spices = cilantro, chili powder and cumin; top with some avocado and peppers
Thai burger: sauce= thai peanut sauce; spices= cilantro and chilis; top with mango
Teriyaki burger: sauce = teriyaki sauce; spices=ginger, extra garlic; top with bean sprouts and peppers
Pizza burger: sauce = pizza sauce; spices = basil, oregano, parsley; top with Daiya vegan cheese and your favourite pizza toppings

I also think that these bean burgers would easily transition to "meat"balls. With tomato paste and Italian seasonings, bean burger balls would add a delicious protein boost to spaghetti.


Sunday, October 3, 2010

Hey, remember me?

It has not escaped my attention that I have not posted since May. Nor has it escaped my attention that I was in the middle of a 52 week challenge that I abandoned outright. I also seem to recall vowing never to let another blog fall victim to my forgetfulness, busyness and general laziness when it comes to my hobbies. And yet here I am, in October, over 4 months later, returning to you, dear reader.

In my absence I have not abandoned cooking. On the contrary, I met a rather wonderful man who shares my undying love and dedication to food. The two of us have concocted many wonderful meals that we pat ourselves on the back for. I have often thought about how I should blog about those meals, and I have actually photographed many of them with that purpose in mind, but somehow life, laziness, and World of Warcraft always seems to get in the way. Well no more! I vow (again) to make an effort to be more dedicated. I will not, however, take up any more 52 week challenges, that force my creativity in a direction it is not always inclined. Blogging had become a chore, and it should not be that way. It should be a celebration of delicious. An adventure into new and exciting realms of taste. An exploration of world cuisine, tradition, and comfort.

I am a stubborn person, however, and therefore I intend to complete the 52 week challenge. I will make 52 salads. They simply won't be made in 52 consecutive weeks.

But this is not why I come to you today. I come to you with tidings of fall delights and easy-peasy awesomeness that will fill your belly with the joy and love that only the fall harvest can bestow. I am speaking, of course, of that most American of fruits - the apple. True, the apple is not native to North America, though neither are most of us. In this context, the apple is very much like we are. It didn't come from here, but it's adaptability allowed it to survive and thrive in our climate, our landscape, so much so that the apples we grow today bear little resemblance to its ancestors in Western Asia. They are Canadian. They are American. The apples of North America have a rich and interesting history that I cannot do justice to. For an engaging and eye-opening read, I strongly recommend "The Botany of Desire" by Michael Pollan (and no, the irony of the author's name has not escaped me).

Factoid: Apple trees in orchards are all clones! The seeds from an apple are so genetically diverse that they will never produce the same tree twice, so to grow a new apple tree that produces the same variety of apple it must be grafted.

Rick and I were on our way back to Kingston one sunny September afternoon. I occasionally like to heed the signs on the side of the road that would direct me to some local gem, seeking out an adventure, discovering what the side roads have in store for me. On this day I decided I would stop at that orchard that I had driven by several times on the drive between the Arnprior and Kingston. Perched high atop Rick's shoulders, I collected some of the most delectable and tempting of apples. The picking was so good and so easy, that I filled my reusable shopping bag. A shockingly small cost later, I had arrived home with an entire crisper drawer full of apples. What on earth would I do with all those apples? After all, I usually only like apples raw, I've never been crazy about apple pie or apple crisp.

One of the things I always have liked is hot apple cider. Sweet, a little tart, with the hint of cinnamon, hot apple cider is just the thing when you come in from a day of dreary fall rain. How hard could it be? As it turns out, not hard at all! I searched the internet for a short while and came across this recipe. It was so easy, and so perfect. I only wished I had a bigger pot, I would have made more! It's all kinds of easy, more kinds of delicious, though it does take some forethought and time. I made it while doing some homework. It filled the house with the sweet smell of apples, and when I was done my homework, this warm brew was my reward.

Absurdly Easy Hot Apple Cider

8-10 apples
1/2 cup sugar (optional)
4 tbsp each cinnamon and allspice (I don't think I used this much of each)
water
large pot (I had a 4.5 liter pot)
cheesecloth & string

Cut the apples in quarters. Don't bother coring or peeling. Place spices in some doubled up cheesecloth and bundle it up. Put apples, sugar and spices in a large pot and fill with water. Boil for about an hour, then reduce to low and simmer for another 2 hours.
Take off heat, pull out spice bundle, and mash the apples. Pour through a strainer lined with cheesecloth into a large bowl. Let it sit there and drip for a good long while. After it has dripped and cooled for a while, gather up the edges of the cheese cloth and give it a squeeze to get out any additional juice.

Voila! You've got yourself some fantastic apple cider! I added the 1/2 cup of sugar but I don't think it would need it. The apples were sweet enough, and if anyone disagrees, they can add a teaspoon or two to their own glass of cider.