Showing posts with label easy. Show all posts

Sunday, February 9, 2014

Healthy Blueberry Oat Pancakes (+ gluten free!)

There's something indulgent and wonderful about weekend breakfasts.  You're not rushed to get out the door, you can take your time and make something delicious.  Suddenly, breakfast isn't just a necessary quest for nourishment you scarf down while you get ready for work, it is once again a meal to be enjoyed.

I'll be the first to admit, North American breakfast doesn't lend itself easily to veganism.  Typical weekend breakfast menus are full of bacon and eggs.  Don't get me wrong, I love a tofu scramble as much as the next vegan, but it still feels like it's lacking something.  As luck would have it, pancakes are particularly easy to veganize.  Unfortunately, typical pancakes, made of white flour and covered in syrup, are nothing but empty calories, devoid of any and all nutritional value.  Sure, it's maple-flavoured empty calories, but let's face it, not the best start to your day.

One day, a few years ago, I accidentally invented something awesome.  I wanted pancakes for brunch, but went to the cupboard to discover I had no flour.  Drat.  I did, however, have an exceptionally large bag of oats.  I had encountered oat flour in baking before, and figured it was a reasonable substitute for wheat flour.  It was not reasonable.  It was amazing.  It was like healthy oatmeal and delicious blueberry pancakes had a lovechild, and then that lovechild rolled around in maple syrup.


Blueberry Oat Pancakes
Serves 2

1 cup oats (gluten-free if that's how you roll)*
1 Tbsp sugar
2 tsp baking powder
a dash of salt
a few dashes of cinnamon
1 Tbsp ground flax seed
3/4+ cup non-dairy milk
Splash o' vanilla
1/3 cup frozen blueberries

In blender, grind oats into flour.
In small bowl combine ground flax with about 1/4 cup of non-dairy milk, mix and set aside to thicken.
In medium size bowl, combine the dry ingredients.  Add remaining 1/2 cup of non-dairy milk, vanilla and flax mix.  Let batter sit for about 5 minutes. Add more liquid if need be (batter should be slightly thicker than pancake batter).
When your skillet is nice and hot (med-high), melt some vegan margarine or coconut oil.  Gently fold frozen blueberries into your pancake batter.  Ladle into pan.  Cook thoroughly before flipping (these pancakes will be more delicate than typical wheat flour pancakes, but should hold together fairly well if cooked enough before flipping).  Cook until nicely browned, but these will take longer than regular pancakes.
Top with real, Canadian maple syrup, berries or bananas.

* A note on Gluten-free oats: For those new to the GF game, oats are inherently gluten-free.  However, typical oats you buy in the store are almost always contaminated, as they are often processed on the same equipment as wheat. For this reason it is essential that you acquire legit gluten-free oats if you are sensitive to gluten.  Bob's Red Mill has GF Oats that you can find at most supermarkets, and if you are in the Ottawa area, Castor River Farm's oats are gluten-free, very reasonably priced and can be purchased at the Ottawa Farmer's Market (check their website to find out which weekends they attend which market).

Tuesday, November 5, 2013

Vegan Masoor Dal Soup

Lentils are a vegan's best friend.  They are tasty, versatile, filling, fast-cooking, and hella-cheap.  I've done a lot of things with lentils in my 6 years of veganism, and tonight I'm sharing one of my favourites.  No big surprise, it's a soup.  Dal, to be exact.  Now in India, "dal" is the word for any legumes (lentils, peas and beans) that have been hulled or split. Dal can also refer to a preparation of legumes, as a stew or soup.  Hulled lentils and split peas break down when you cook them, which is perfect for making thick, stick to your ribs soups.

Now, I have to confess something.  I hate peas.  Peas of all kinds.  Most of all, I hate yellow split peas. Pea soup?  Grossest food on the planet.  I know, not very vegan of me.  But I know that they are super good for you, so I've put them in this soup, and maybe, little by little, I can teach myself to like them.  I've kept my pea-to-lentil ratio low, but if you like peas, by all means, add more!

As discussed above, it is important to use hulled lentils in order to get the right texture.  Red lentils will do the trick and easy to find in most grocery stores, but any other hulled lentil will do.

Vegan Masoor Dal

1 onion, minced
3 cloves garlic, minced
1 carrot, shredded or finely chopped
3-4 kale leaves, finely chopped
1 tsp turmeric
1/2 tsp each cumin, garam masala, & cayenne pepper (to start)
1 1/2 cups red lentils
1/2 cup split yellow peas
5 cups vegetable broth

Mince up your veggies and saute in a pot with a bit of oil.  Save yourself some time and mince up your veggies in a food processor if you have one.  Add the rest of the ingredients and simmer until the lentils are cooked.  Taste the soup, and add more spices to taste. Serve with papadams or vegan naan bread if you can find it (most naan has dairy in it, but I've found vegan ones at the grocery store before).

Friday, March 22, 2013

The Trouble with Pesto

The trouble with pesto is that as tasty as it is, I really hate having garlic breath afterwards.  This makes pesto a poor choice for take-along lunches for work.  Nevertheless, I love pesto.  I find it a much tastier way to enjoy pasta than a traditional tomato sauce.  Also, sometimes tomato sauce upsets my somewhat cantankerous digestive system.  Pesto you find in stores or restaurants will typically have cheese in it, so if you want vegan pesto you will most likely have to make it yourself.

Pesto is really quite easy to make, particularly if you have a food processor.  A few cloves of garlic, a handful of fresh basil leaves, freshly squeezed lemon juice, some nuts (ideally pine nuts, but walnuts will do if that's what you have on hand), and a good helping of nutritional yeast, and you're away to the races.  You can also add any other fresh herbs you have on hand, spinach, kale, whatever you like to the processor, and blend!  Typically, pesto is quite oily as people will create a sauce of it by adding olive oil, but I've been trying to avoid unnecessary extracted oils (I get all the healthy fats I need from nuts and seeds).  I recently made myself a batch of pesto, and to thin it out, I used the starchy pasta water and it turned out perfectly.  I'd like to show you a picture, but I ate it all before I got the chance!

Wednesday, February 13, 2013

Sprouting with the BioSnacky!

BioSnacky?  What's that, you say?

For christmas I received a gift card to the Natural Food Pantry, and I did what any good vegan would do with a natural food store gift card burning a whole in their wallet - I bought a sprouter! Ok, to be honest, I was totally considering buying $50 worth of Daiya with my gift card, but as luck would have it, on the way to the Daiya aisle I spotted the BioSnacky 3-tier Germinator!  With three different levels I could simultaneously sprout 3 different kinds of sprout, or alternatively, stagger my sprouting so that ever other day I have a fresh batch of new sprouts!  There are entirely too many exclamation marks in this paragraph, but I don't care, that's just how excited I was about this thing.
Triple the tiers, triple the fun!
So, you might be asking yourself "Why sprouting?".  Fresh sprouts are live, actively growing food, full of enzymes and vital nutrients.  Sprouting makes available nutrients that wouldn't be available or accessible in the pre-sprouted state.  In addition to the usual alfalfa and mustard sprouts you might find in the grocery store, you can sprout just about any legume or seed.  You can sprout chickpeas or lentils, and once sprouted, they don't need to be cooked in order to eat them (bonus!).  Looking for raw, plant based protein?  Alfalfa sprouts are 35% protein, clover - 30%, lentil - 25% [1].  Combined that with their low calorie content, and high concentrations of vitamins and phytonutrients, that makes sprouts among the most nutrient dense foods out there.  Best of all you can grow them yourself in your own kitchen - no green thumb required!

You can easily grow your own sprouts the low-tech way - all you need is a mason jar topped with some cheesecloth or other mesh-like product.  Frugal-Wise has a nice post on jar sprouting (I love the dish rack idea - brilliant!).  This is a totally legit way to sprout, I've done it before, and it worked out just fine. But there was something about the Biosnacky that called to me. Probably because it reminded me of giant petri dishes.  Clearly, the Biosnacky 3-tier Germinator is the nerdy way to sprout, and well, I'm a nerd.
Here's the deal - you pour water into the top tray to just above the red node until the water drains into the next tray.  When it reaches a high enough level in the second tray, that one will start to drain, and so on.  No soaking, no swirling, no shaking or tapping.  Just pour, and the Biosnacky takes care of the rest.  It took an already easy task, and made it even easier!  In just 4 short days, I had a smorgasbord of fresh sprouts!

What do you do with sprouts?  You can toss them in salads, stir-fries, smoothies, or my personal favourite - put them on sandwiches!
The HST Sproutwich - Hummus, sprouts, and tomato!
For everything you could possibly want to know about sprouting, as well as buying seeds, check out the Sprout People.  If you're in Canada, you should purchase seeds from Mumm's Sprouting Seeds (they offer free shipping in Canada for orders over $25!).

Monday, January 7, 2013

Freedom Never Tasted So Good

Ok, ok.  I've been a bad blogger.  Again.  Sorry.

On a brighter note - I just made the best muffins ever!  AND they're gluten-free!

So what's the deal with gluten anyway?  Much like veganism, it's been getting a lot more buzz lately.  But, in case you're still in the dark, here's some information.  No skipping past the knowledge to the muffiny goodness!

The word "gluten" comes from the latin word for "glue".  No, I'm serious.  You see, gluten is a protein found in wheat (and related grains like barley and rye), and is a binding agent used in baking - it's what gives bread dough it's stretchy, elastic consistency. For a very long time this posed a big problem for those trying to bake gluten-free goodies.  Gluten Intolerance is a spectrum of disorders involving people who have adverse reactions to gluten, from sensitivites, to full-blown auto-immune response (aka celiac disease).  While celiac disease has been pretty well researched, non-celiac gluten sensitivity is still poorly understood, but it can trigger many similar symptoms, such as digestive upset, headaches, and fatigue.  What we do know is that more and more people are discovering that they feel better when they are not eating gluten.

It is estimated that 1 in 133 Canadians are affected by celiac disease [1].  Throw in the folks with gluten sensitivity, and well, it just makes good sense to learn how to cook without gluten!   Two of my close friends are gluten-intolerant, and I myself spent a year eating gluten-free as I suspected it as a culprit in my digestive woes.  When I first started cooking gluten-free (6 or more years ago now!) it was a challenge.  There was no Gluten-Free section at the grocery store, you couldn't find gluten-free goodies in your local bakery, there was no gluten-free pizza crust or hamburger buns available at restaurants.  What a difference 6 years makes!  Times have changed, and as awareness grows, so is the availability of products and resources.

Take, for instance, Bob's Red Mill All-Purpose Gluten Free Flour.  With one easy step you can transform any baking recipe into a gluten-free one.  Which is just what I did with the delightful muffins I'm about to teach you how to make.

Om nom nom... 


Gluten-Free ChocoNana Walnut Muffins!
Makes 12-15 muffins

1 1/2 cup all-purpose gluten-free flour
1 cup sugar
1/4 cup cocoa
1 tsp baking soda
1/2 tsp salt
1/2 tsp baking powder
1/2 tsp cinnamon

1 1/3 cup mashed, ripe bananas
1/3 cup vegetable oil
1/3 cup non-dairy milk
1 tsp vanilla

1 cup chopped walnuts

Whisk together dry ingredients (= lazy man's "sifting").  In a separate bowl whisk together wet ingredients.  Add wet to dry.  Fold in walnuts.  Pour into greased or lined muffin tins.  Bake at 350 for about 20-25 minutes, or until muffins are set and toothpick comes out clean.  Devour.


Tuesday, April 10, 2012

Taraxacum officinale

Has this ever happened to you?  You're in the grocery store or farmer's market, and you spot something.  "Hmm..", you think to yourself, "I've never had that before, I wonder what I could make with it!" This time, that something was dandelion greens.  As a biologist, I knew that the latin name for dandelion is Taraxacum officinale, and any plant with the species name officinale, officinalis, or officinarum indicates that it is a medicinal plant.  I figured that there must be something special about dandelion greens to have afforded it such a long-standing medicinal status.  Although often viewed as a pesky weed, it is undeniably a tenacious survivor, a quality that is indeed admirable.

After returning home with my greenery, a quick internet search revealed that dandelions are an incredible herb.  Traditionally they are used as a diuretic, improve kidney and liver function, aid digestion, stimulate appetite, act as a mild laxative, and the list goes on.  Recent research indicates dandelion can be used for weight loss, normalizing blood sugar, lowering cholesterol, and as a disinfectant. [1, 2, 3].  Nutritionally, they are an excellent source of calcium, iron, potassium, manganese, vitamins A, B3, B6, C, E, K, thiamine, riboflavin, and folate [4, 5].  That only scratches the surface.  Take home message: eat more dandelions!

Problem being, dandelion greens are really quite bitter.  Young greens aren't so bad, and are often found in "spring mix" salad greens.  The greens I bought were older, and when I sauteed them up with some garlic salt &  pepper like I would normally do with spinach, kale, or collards, they were much more bitter than I would like.  I figured to make them more palatable, they would need to be paired with something sweet.  Tonight's dinner was an overwhelming success!


Sweet Potato and Dandelion Saute
1 sweet potato
1 tsp rosemary
1 cup dandelion greens
1 cup other greens (I used beet greens)
1/4 cup diced red onion
1-2 cloves minced garlic

Roast the sweet potato with the rosemary in the oven until soft.
Saute onion for a few minutes in a bit of olive oil.  Add garlic, saute for 30 seconds.  Add greens and cooked sweet potatoes, toss until greens have wilted.  Salt and pepper to taste and enjoy!

Saturday, April 7, 2012

Vegan Easter Awesome

I always remember Easter as being a pretty fun time when I was a kid.  Easter meant egg hunts, chocolate, and decorating eggs.  This year, with my niece about to turn two, the fun times can start again.  My mom and I orchestrated her first egg hunt, which she was super good at!  We figured two was a little young for egg decorating, and let's face it, it isn't exactly a vegan tradition.  So I came up with a better idea.  A way better idea.  Let's decorate egg-shaped cookies!  Not only are they vegan and less fragile, but once you're done decorating, you get to eat them!

I made the sugar cookie recipe from Vegan Cookies Invade Your Cookie Jar, some simple icing, and I had purchased a whole lot of fun sprinkles from bulk barn.  I taped some parchment paper to the coffee table, and handed her some freshly iced cookies for her to sprinkle at will - and sprinkle she did!  As you can see, they are masterpieces! :)  The cookies were delicious (albeit crunchy with the copious amounts of sprinkles), and I think I've just found myself a new Easter tradition.

My family had our celebration on Good Friday, and we discovered at the last minute that my sister-in-law, who is catholic, cannot eat meat on Good Friday.  Good thing there's a vegan at the table!  I made the vegan quiche from Fat Free Vegan Kitchen, and put green onion, red pepper, and broccoli in it instead, and topped it with cheddar style Daiya shreds.  It was super yummy, and my sister-in-law thought so too (she even asked for seconds!).  Definitely omnivore approved! This quiche tasted just as good (possibly better?!) the next morning for breakfast, and I am going to start making it regularly as an easy make-ahead breakfast that is fast and nutritious for busy mornings.

What holiday would be complete without cupcakes?  These cute easter cupcakes are super easy to make.  First you take your basic vanilla (or chocolate if you prefer!) cupcake and fluffy buttercream icing from Vegan Cupcakes Take Over the World.  Then you colour some shredded coconut the spring colour of your choice, and roll the cupcakes in the coconut to form a "nest" around the outside (leaving the middle un-coconuted).  Then stick some mini-eggs in the middle, and ta-da!  Bird Nest Cupcakes! I know mini-eggs aren't vegan, but they make the perfect decoration (I gave mine to my mom to eat).  If anyone know of any vegan mini-eggs or something that would take their place, let me know so that next year they can be truly vegan, decor and all!


Monday, October 3, 2011

Brrr!

Well it's October. Don't ask me how it happened, I haven't a clue.  It's summer, everyone is warm and happy, you look away for one second and BAM! cold, damp, fall swoops in to put an end to sundress season.   Wasn't it only last weekend that I was sweating my butt off hiking through Gatineau Park on a beautiful 25 degree day?  Yep.  That was definitely only 8 days ago.  Regardless of what evil trickery brought it about, it's here now, and we're just going to have to deal with it. Autumn has arrived, and that means it's time to bust out the jackets and scarves, and it's also time to start making soup.

Lookout view over Gatineau park, Sept. 25 - the leaves just starting to turn

The really great thing about autumn (or as I like to call it "soup season") is that the fall harvest brings a bounty of produce to the local farmers markets.  So many soup possibilities await!  All of the produce in this warming, immune-system-boosting soup can be found at the farmers markets now.  You can make this in two ways: soup or stew.  I'll tell you how I made the soup, then what you can do differently to make it a stew instead!

Vegan Groundnut Soup 
Makes about 2 big meal-sized servings, or 4 small "on the side with a sandwich" sized servings

1 onion, diced
2-3 cloves garlic, minced
1 tsp fresh ground ginger
1 red pepper, chopped
4 plum tomatoes, diced
1-2 sweet potatoes, cubed (1-2 cm cubes)
Enough vegetable broth to just cover the vegetables
Cayenne pepper to taste
1/4 cup peanut butter (all-natural preferred)

In a large pot, saute onions with a bit of oil for a few minutes until they soften.  Add in garlic and ginger and saute for one minute.  Add the tomatoes and red peppers and saute until tomatoes start to break down.

Add remaining ingredients making sure to only put as much vegetable broth in as is needed to cook the sweet potatoes - you can add more liquid later, but it's more difficult to take it away.  Bring to a boil and simmer until sweet potatoes are cooked.

Using a hand blender, pulse soup to form a thick, creamy base while still leaving lots of chunks of vegetables. Alternatively, you can remove 1/3 to 1/2 of the soup and puree in a blender, then return it to the remaining soup.  Add more liquid if needed to reach desired soup density.


Stew form: Chop vegetables into larger chunks, do not puree at the end, and serve over rice.  Top with chopped peanuts and cilantro.  You may also add beans, tofu, or faux chicken to this stew if it pleases you.

Friday, September 30, 2011

Peachy Green

I love smoothies.  They're hard not to love - delicious, healthy, filling, and can be consumed on your commute to work (unless you cycle, that would be tough).  But lately I feel like I've been in a smoothie rut, making the same couple of smoothies every day.  I needed to branch out!  Shake it up a bit!  So yesterday, while at the grocery store, I spied the box of spinach and thought to myself - it's time to go GREEN.

No one will argue the benefits of leafy greens.  In them you'll find vitamins A, C, K, folate, fiber, calcium and iron.  Wait a sec.... just what is vitamin K?  It's not one of those vitamins you hear a lot about.  But like all vitamins, it's extremely important.  It plays a major role in healthy blood clotting and it is also vitally important to bone health.  Post-menopausal women who are experiencing bone loss can help prevent fractures by consuming adequate amounts of vitamin K.  Vitamin K also inhibits calcification (aka "hardening") of the arteries that is commonly associated with heart disease.  Vitamin K deficiencies can lead to heavy menstrual bleeding, gum bleeding, nose bleeds, easy bruising, anemia, bone fractures and osteoporosis. [1] The best source of vitamin K?  Leafy greens.

Don't worry, you don't need to gorge yourself on leafy greens for fear that your blood will stop clotting and your bones will break.  One cup of cooked spinach has over 1000% of your required daily intake of vitamin K.  Leafy greens such as spinach, kale, collard greens, swiss chard (you get the idea) all have whopping amounts of vitamin K.  So as long as you make some leafy greens a part of your regular diet, you'll be just fine.


Back to the smoothies.   I have made a green smoothie or two in the past.  Search google for "green smoothie" and you will turn up over 1.8 million hits.  After a little searching and a few of my own attempts I have a few tips for my fellow green smoothie noobs:

  1. Adding berries to a green smoothie will produce an unappealing brown smoothie.
  2. Use well-ripened bananas for creaminess and sweetness.
  3. Spinach has a mild flavour and is a good "starter green"
  4. Blend like hell - you don't want leafy chunks in your smoothie.

Peachy Green Smoothie

1 banana (frozen)
1-2 peaches
1 tbsp ground flax seed
a handful of baby spinach 
Enough water or soymilk to make it blendable

Throw it all in a blender, blend on a high setting for at least a few minutes (or until the leaf chunks disappear)

The verdict: really quite tasty!!  The spinach flavour is barely perceptible, and I have to admit, I enjoy the green colour.  This will definitely join the regular smoothie rotation.


Tuesday, July 12, 2011

Tis the season

Farmer's Market season is well under way, and, here in Ontario, July and August offer the widest variety of fresh local produce for you to plunder.  Don't believe me?  Check out the availability of produce on Foodland Ontario's website. One of my favourite market buys is green beans.  Whether you eat them raw or steamed, green beans are tasty, low-cal morsels of goodness.  A cup of green beans offers 30% of your RDA of vitamin C, 15% of the RDA of vitamin A, and 4g of fiber, among many other vitamins and minerals.[1]

It may surprise you to know that green beans belong to the same species as black beans, navy beans, pinto beans and kidney beans (to name a few).  Phaseolus vulgaris was domesticated in Central America as early as 7000 B.C. [2] .  If you're thinking to yourself "Wait, green beans look nothing like kidney beans!" , that's because green beans are "immature" pods.  Just like pea pods, inside the green bean pod grows the round bean that would one day mature and harden into the "dry bean", which is the seed of the bean plant.  Unfortunately for the hard-working bean plant, and fortunately for us, we harvest green beans long before they mature, while they're still crisp and tender.


July and August is also prime BBQ and picnic season.  Potato salad, often in the form of a mayo-laden mush, is ubiquitous at such events.  But this is neither vegan nor is it healthy (or remotely tasty, in my opinion).   For your next summer potluck event, why not bring a big bowl of Green Bean & Potato Salad?  With local green beans and new baby potatoes available at the markets (or maybe even in your own garden, you lucky duck), it's a fresh and tasty departure from the old standby mayo-mush.

Saturday, May 28, 2011

Anniversary Pancakes

Today is my one year anniversary with Rick! (xoxo)  One of the things we have in common is our undying passion for food.  It seems only fitting that this day should be celebrated by creating some truly epic pancakes.  I'm sure I'm not the first person to come up with chocolate pancakes, but maybe those of you reading this blog have never tried to make them. I think there comes a time in everyone's life when you need to have chocolate pancakes for breakfast.  And when that time comes, I hope you'll top them with peanut butter sauce, bananas, and real Canadian maple syrup.


I'd love to give you the recipe for these pancakes, except that I never use a recipe when I'm making pancakes.  I'll do my best to approximate, and you can go from there or just adapt your favourite pancake recipe to add chocolatey goodness. Be warned that this is in no way a precise recipe, but I've included approximate quantities for those of you who like to measure things.

Cocoa Pancakes
makes 2 generous servings
~ 1 cup flour
~ 2 tbsp sugar
~ 2 tsp baking powder
~ 3-4 tbsp cocoa
~ 1 tsp vanilla
enough non-dairy milk to reach desired pancake thickness
(I would also have added ~1/4 cup of minichips if I had some on hand)

Mix, fry, and top with bananas & peanut butter sauce (strawberries/raspberries & chocolate sauce would be pretty awesome too).

Peanut Butter Sauce is a staple in our house for pancakes and crepes because we're both obsessed with peanut butter.  Simply take a few good dollops of peanut butter and thin it out with some soy milk, a little at a time until you get a nice creamy sauce.  Add honey, maple syrup or agave nectar to sweeten to taste.  Yummmm!!!

Sunday, April 17, 2011

Oh yeah.... that

Hey!  Remember when I used to write in here on a somewhat regular basis? Yeah.... sorry blog.  Sometimes life gets in the way, the passion dwindles, and you start asking yourself if you're even interested anymore.  Well I'm determined not to let a good thing slip away, and I will do what I can to reignite the cooking fires!

It's not like I stopped cooking.  Ok, I have been doing less of it lately.  I could make excuses, try to explain away my absences... but lets face it, excuses are lame.  I want to pledge allegiance to my blog, to solemnly swear to update it weekly, but I'm not in the habit of making promises I can't keep.  I learned my lesson during my failed attempt at a "52 week challenge" (quite frankly I'm surprised I made it a whole 20 weeks before I gave it up).  Let's just say I'm going to try harder.

In spite of my apparent lack of ability to commit to a blog, I started a second blog, called "Ash Out of Doors".  This is where I intend to share my outdoor adventures, and primarily, the wildlife I encounter along the way.  Considering that I'm a biologist, this only seems natural.  I'm hoping that being drawn to blogger to show off my latest nature pics will also inspire me to show off my culinary prowess while I'm there.  It's worked so far, since I'm here after having written my latest Out of Doors post.

Ok, enough rambling, onto the food!

Last week I threw together a couscous tabouli that was fresh, bright, and super easy.  If you're not familiar with couscous, you ought to be.  It's just about the easiest thing to prepare and infinitely versatile.  Couscous is essentially tiny little balls of wheat.  Pour a cup of boiled water onto a cup of dry couscous, and in 2 minutes  you've got yourself 2 cups of fluffy couscous.  It's seriously that easy.  Since it's just wheat, it can be flavoured in any way you can imagine.  Use broth instead of water, stir in some fresh herbs, let it cool and mix in veggies, nuts, and dried fruit for a tasty salad, whatever!

Tabouli (or tabbouleh, depending on who you ask) is a Lebanese salad that traditionally made with bulgur, parsley (and often mint), tomato, onion, and lemon juice.  Bulgur requires a half hour to soak and another half hour to cook, and while that's not a lot of time, some days we just want to flick the kettle on and be done with it, you know what I'm saying?  So this is a little less traditional, but still totally delicious.


Lazy Couscous Tabouli

1 cup dry couscous
1 cup boiling water
1/2 bunch parsley, finely chopped (about a cup chopped)
1/2 cucumber, diced
3-4 roma tomatoes, seeds & slime removed, diced
1/2 red onion, diced
2-3 cloves garlic, minced
juice of 3 lemons
1/3 cup olive oil
Salt & pepper

Pour boiling water over couscous and let it sit for a few minutes. Fluff with a fork and let cool.

Add remaining ingredients to cooled couscous, chill in the fridge and allow to marinate for an hour or so, if you want.  To speed up the preparation of this dish and augment the lazy factor, employ the use of a food processor for veggies and especially parsley.  Deviating from tradition once again, I threw cucumbers in here because I love them and think they belong in almost any salad.

Salad Challenge Countdown
Salads made: 21   Salads left: 31


Yeah, I'm still keeping track of the salads, even though the last salad recipe I posted was about 11 months ago.  I insist that 52 unique salads can and will be made.  You just wait and see!

Thursday, November 4, 2010

Squash-travaganza!

Let's talk about squash.  I love squash.  All kinds of squash, even the sport!  Squash squash squash!
Sweet dumpling and acorn squash
Squashes belong to the family Cucurbitaceae which includes such wonderful fruits as melons, gourds and cucumbers.  There is a huge variety of squashes, including pumpkin, zucchini, butternut, acorn, hubbard, cushaw, buttercup, sweet dumpling, celebration, cream of the crop, sweet mama, turban, spaghetti, delicata, heart of gold.... and still more that I haven't heard of yet.

Celebration, Cream of the Crop, and Heart of Gold squash
Although there are so many varieties, they belong to only four species:  Cucurbita maxima (hubbard squashes), C. mixta (cushaw), C. moshata (butternut squash), and C. pepo (pumpkins, zucchini, acorn squash).
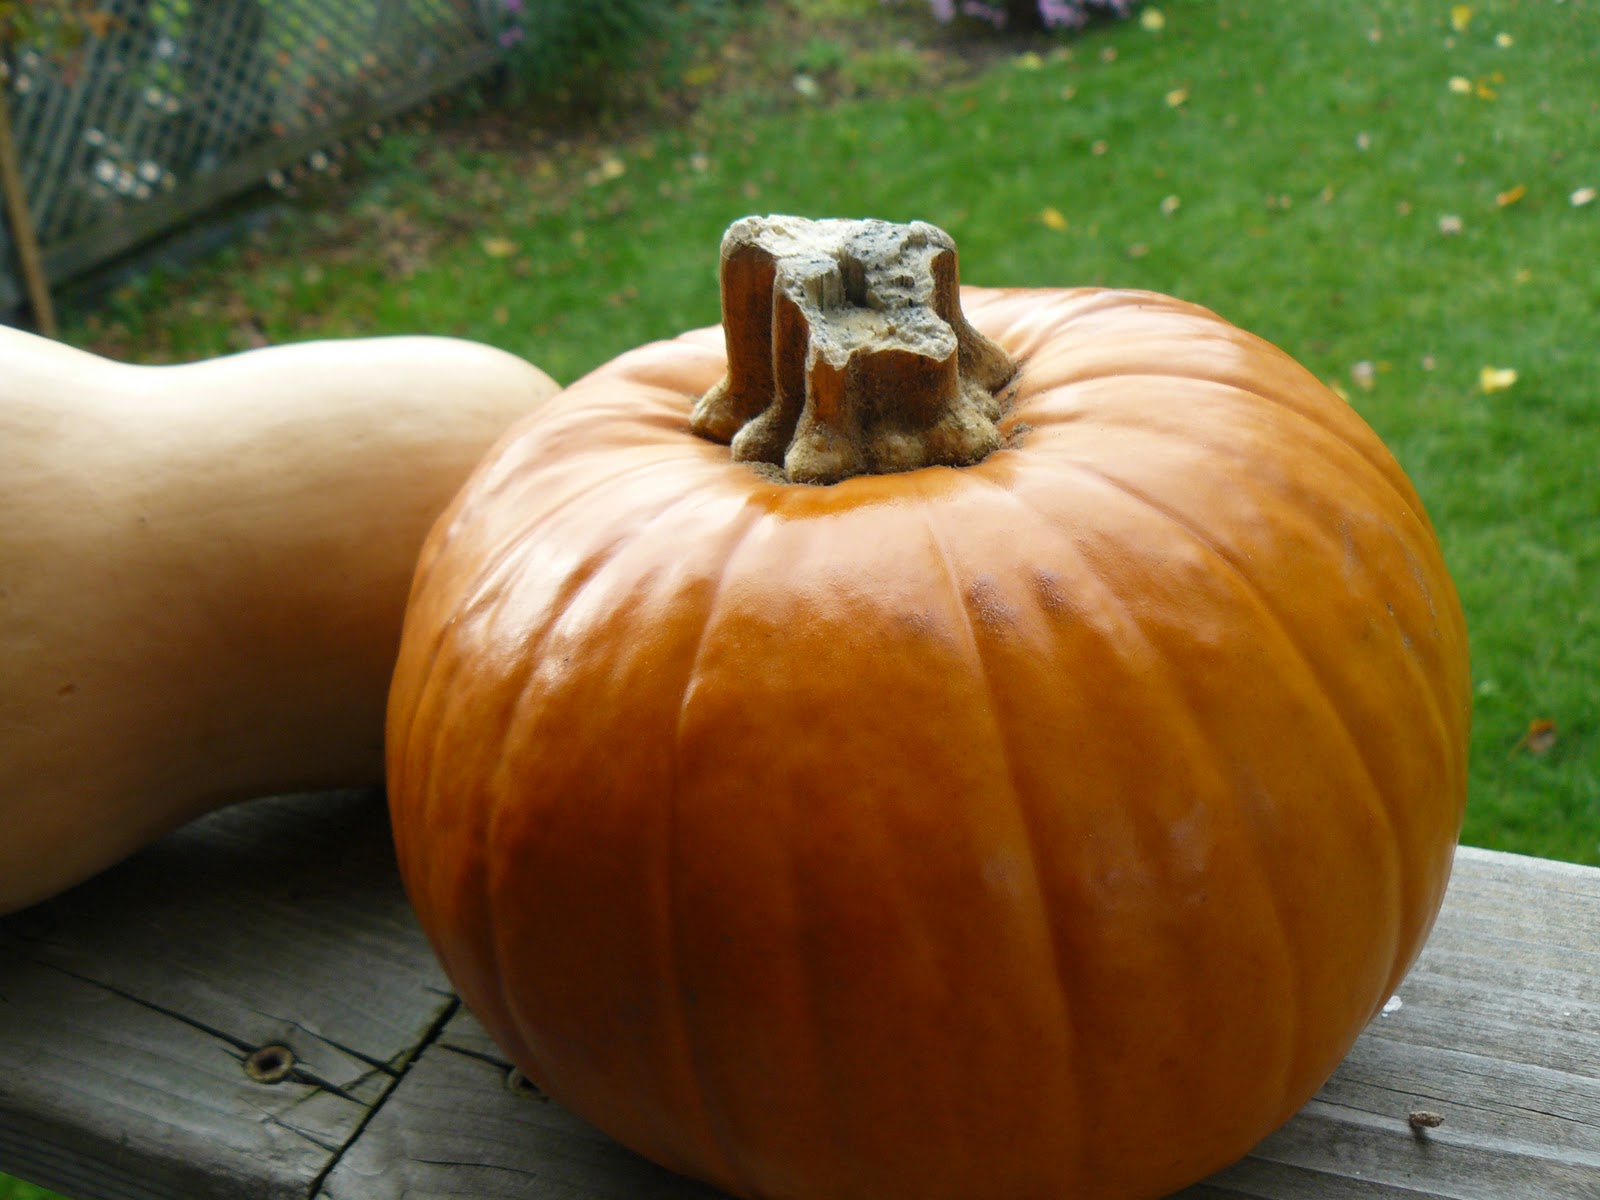
Butternut squash and pie pumpkin
Squash were domesticated in Mexico eight to ten thousand years ago [1].  They were an important food staple in central and north america.  Native Americans know squash as one of the "Three Sisters", along with corn and beans.  The three crops were planted together - the corn stalk was used to support the bean vine, and the large squash leaves trapped moisture in the ground for the growing plants and inhibits the growth of weeds.  Incidentally, combined together, squash, beans and corn make an excellent "Three Sisters soup".
Oven-roasted Sweet Dumpling squash with Sweet & Savory Quinoa
There are many ways that I like to use squash.  Have a sweet tooth?  Try these totally awesome chewy pumpkin oatmeal cookies.  They're my all time favourite cookie and I have yet to meet someone who doesn't love them.  Zucchini is awesome sliced, seasoned, and roasted in the oven or grilled on the barbecue (or campfire!).  Acorn squashes and their kin are perfect cut in half, roasted in the oven, with a little margarine and brown sugar sprinkled inside.  Butternut squash is my favourite for making fantastic (and filling) soups.
Butternut squash soup with maple syrup drizzle (and my cat Skrabble!)
Basic Butternut Squash Soup

1 onion, diced
1-2 tbsp margerine
1 Butternut squash, peeled & cubed
Water
vegetable bouillon cubes
Nutmeg, cinnamon & allspice, a few good dashes of each
Maple syrup for drizzle (optional, but awesome)

Saute onion in margarine until caramelized.  Toss in the squash and add enough water to just cover the squash. *Tip: measure your water as you're pouring it in so you know how many bouillon cubes to add!* Add your bouillon cubes and spices, and bring to a boil.  Let it simmer until the squash cubes are soft.  Puree the soup with a hand blender. If you're using a regular blender, make sure you vent the lid and cover it with a cloth so it doesn't create a pressure build-up and burst hot steam/soup in your face.  Nobody wants to be burned by squash.  At this point the soup could be pretty darn thick, so add some water, a little at a time.  I like to be conservative with my water during cooking because you can always add more but it's so much harder to take it away if you've added too much!  When you get the soup to the desired consistency, ladle some in a bowl and swirl a drizzle of real maple syrup on top, perhaps grate a little nutmeg on there.  Not only does it taste delish, it makes it look extra snazzy!

Wednesday, November 3, 2010

Going green

This summer, while living in Kingston, I regularly frequented their fantastic farmer's market. While at one of the booths I overheard one of the farmers describing tomatillos.  As the name would suggest, they belong to the tomato family, and are closely related to ground cherries.  Like ground cherries, they're wrapped in a beautiful papery husk that remind me of paper lanterns.   They taste a bit like tomatoes, but a little more tart and I found them a bit sweeter.  I love experimenting with new ingredients, but to be honest, I bought these because they're so darn pretty.

Tomatillos are a staple in Mexican cooking, particularly in Salsa verde, so naturally, that's what we made with them!  In fact, we had a whole mexi night, and made fajitas with homemade whole wheat flour tortillas!  I don't remember which website I got the tortilla recipe from, but they're all more or less the same. The rolling of the tortillas was a bit time consuming, but otherwise, it was really easy!  A quick cook in a hot, dry pan, and bam!  Fresh, homemade tortillas!


The salsa verde was a sweet, fresh and tangy alternative to my usual homemade salsa.  I made this a long time ago so I can't tell you how much I used of what, but just wing it!  That's what I did!

Salsa Verde

-Tomatillos
-Onion
-Jalapenos
-Fresh cilantro (don't be shy!)
-Fresh lime juice
-Sugar
-Garlic


Combine ingredients in a food processor (or chop the heck out of it!) so that everything is chopped finely but still has enough chunkiness to give the salsa some body.  That's how I like it at least.  

Tuesday, November 2, 2010

Bean Burgers and Blogrolls

While some of you may be celebrating the month of November by growing a hideous creature on your upper lip (aka the Movember Mustache), vegans are celebrating by blogging about delicious food. This year marks the fourth annual Vegan Month of Food, affectionately known as Vegan MoFo. Over 500 vegan bloggers have signed up this year to share their love of food with the world. Heck, with numbers like those, there are probably vegan bloggers who are growing
mustaches. I would have been one of them (blogging, not growing a mustache), but I missed the sign-up deadline by a matter of hours. Bummer. I will still be posting delicious recipes this month in honour of Vegan MoFo, and I encourage you to check out the blogroll and marvel at the plethora of vegan wonders that will present themselves to you daily.

Tonight for dinner I made some homemade bean burgers that were so good, easy, and versatile, I can't see myself spending money on store-bought veggie burgers ever again. I've made other forms of veggie burgers before, and they always fall apart and are never quite as good as my old standby, the Lick's Nature Burgers. These actually held together! Our BBQ is packed away for the season, so I didn't try them out on the grill, but if that's how you want to roll, I would try freezing them first so they don't get lost between the grills.

I'll give you the basic recipe, and you can jazz it up however you like. The possibilities truly are endless people!

Honey garlic style bean burgers with sweet potato homefries

Basic Bean Burgers
Makes about 6 normal sized patties

1 can kidney beans, drained and rinsed
2 tbsp ground flax seeds
1/3 cup water
1/2 onion
2-3 cloves of garlic
2 tbsp olive oil
3 tbsp sauce*
Spices*
3/4 cup bread crumbs

In a wee dish, combine the water and flax seeds and let them sit and goop up while you work.
In a large bowl, mash up the kidney beans to form a paste.
Mince onion and garlic in a food processor and add to bean mixture, along with oil, sauce, and spices. Add the now gelled up flax seeds.
Add the bread crumbs a little at a time, mixing well, until you get a stiff mixture, about the consistency of cookie dough.
Shape into 6 patties (or 4 if you like your burgers really thick!). Bake in the oven at 350-375ish for about 15 minutes, then flip, brush with sauce (optional, but why wouldn't you?!) and bake for an additional 10-15 minutes. Put it on a bun, top it however you like it, and enjoy!

* Some thoughts on sauces and spices.
This is where you get to have fun with your burgers! The possibilities are endless here for different burger combinations. In the burger pictured above I kept it simple, using honey garlic BBQ sauce, and a few dashes of plain old salt and pepper as my spices. You can use all kinds of things for your sauces such as traditional BBQ sauce, chili sauce, salsa, stir-fry sauces, spaghetti sauce, pizza sauce. If it's a sauce, chances are there's a way to incorporate it into a burger.

Below you'll find a few ideas that you could use to jazz up your bean burgers:

Mexi burger: sauce= salsa; spices = cilantro, chili powder and cumin; top with some avocado and peppers
Thai burger: sauce= thai peanut sauce; spices= cilantro and chilis; top with mango
Teriyaki burger: sauce = teriyaki sauce; spices=ginger, extra garlic; top with bean sprouts and peppers
Pizza burger: sauce = pizza sauce; spices = basil, oregano, parsley; top with Daiya vegan cheese and your favourite pizza toppings

I also think that these bean burgers would easily transition to "meat"balls. With tomato paste and Italian seasonings, bean burger balls would add a delicious protein boost to spaghetti.